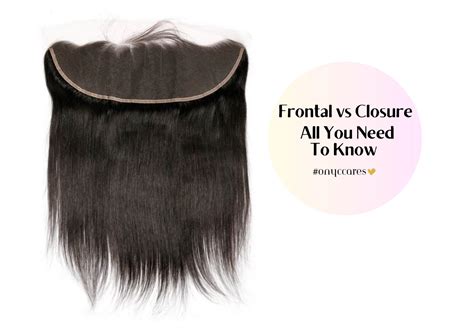
Understanding the Side Part Closure Sew-In is essential for achieving a seamless, natural look. When you install a side part closure sew-in, you’re essentially combining a lace closure with human hair extensions to create a seamless, natural look. The closure acts as a cap, covering the natural hair, while the hair wefts are sewn into cornrow braids underneath. The result is a secure and low-maintenance hairstyle that lasts for weeks.
Why Choose a Side Part Closure Sew-In? It’s about Easy Maintenance and Longevity. A side part closure sew-in is not only stylish but also low-maintenance. With proper care, the closure can last anywhere from 6 to 8 weeks, and it’s a less expensive option compared to frontals. It requires minimal upkeep and doesn’t expose your hair to heat damage, allowing it to rest while still looking fabulous.
Protect Your Edges is a key benefit of this method. The lace closure is placed behind the hairline, ensuring there’s no tension on fragile edges, which can help prevent breakage. This makes it a great choice for those concerned about preserving the health of their natural hair.
Versatility in Styling is another major advantage. One of the greatest things about a side part closure sew-in is how versatile it is. From sleek and sophisticated styles to relaxed, beachy waves, this closure gives you the flexibility to style your hair in different ways without compromising on comfort or security.
Comparison Matrix
| Feature | Side Part Closure Sew-In | Lace Frontal Sew-In | Full Sew-In | Wig Installation |
|---|---|---|---|---|
| Maintenance | Low | Medium | High | Low |
| Longevity | 6-8 weeks | 6-8 weeks | 4-6 weeks | 2-4 weeks |
| Cost | Affordable | Expensive | Moderate | Affordable |
| Styling Versatility | Moderate | High | High | Moderate |
| Edge Protection | Yes | No | Yes | No |
Wealthy Hair Maintenance Protocol: Step-by-Step Guide
Here’s how to slay your side part closure sew-in like a pro, step by step:
- Prep Your Hair: Start by braiding your hair into tight, flat cornrows.
- Position the Lace Closure: Place the lace closure on the crown area and adjust it to create your desired side part.
- Install the Wefted Hair: Sew the human hair wefts from the nape of your neck to the front.
- Final Touches: Once the hair is sewn in, plucking the part along the side will create a natural appearance. Style the hair as desired!
The Wealthy Hair Quality Standard emphasizes sourcing only the highest-quality human hair extensions for lace closures. Our hair is carefully selected from ethical suppliers to ensure donor integrity and long-lasting durability. We prioritize sustainability and quality control, so you can trust that every installation will be flawless.
People Also Ask
What Is a Lace Closure Sew-In? A lace closure sew-in uses a small piece of lace material to cover the scalp, blending seamlessly with your hair. This closure type gives the appearance of a natural part and is secured by sewing the closure into cornrow braids.
How to Achieve a Seamless Side Part Lace Closure? For a seamless look, make sure your lace closure is installed flat against the scalp. Plucking the part gently will ensure a natural side part, and sewing human hair bundles in tightly will help the hair lay smoothly.
How to Lay a Lace Closure Flat for a Natural Look? Use mousse and an iron comb to flatten the lace closure. Make sure the lace closures are secured tightly with thread, and trim any excess lace to ensure it blends perfectly with your hair.
What Are the Best Hair Types for Sew-In Closures? Human hair is always the best choice for a lace closure, as it offers the most natural look and can be styled in many ways. Remy hair with intact cuticles will provide a smoother, more manageable style that lasts longer.
How long do lace closure sew-ins last with proper care? Lace closure sew-ins can last at least 6 months with proper care and maintenance.
What are the benefits of lace closures compared to frontals? Lace closures are generally 30-50% cheaper than frontals, require fewer salon visits, and are easier to maintain with less glue needed.
What is the installation process for a side part closure sew-in? To install a side part closure sew-in, you will need a wig cap, mousse, iron comb, wig glue, needle, and thread. The process involves sewing in hair extensions and creating a side part for a natural look.
What face shapes are best for side part closures? Side part closures are perfect for square face shapes, as they soften sharp facial features and balance the face’s proportions.
What styling options are available with lace closures? Lace closures offer limited styling options compared to frontals.
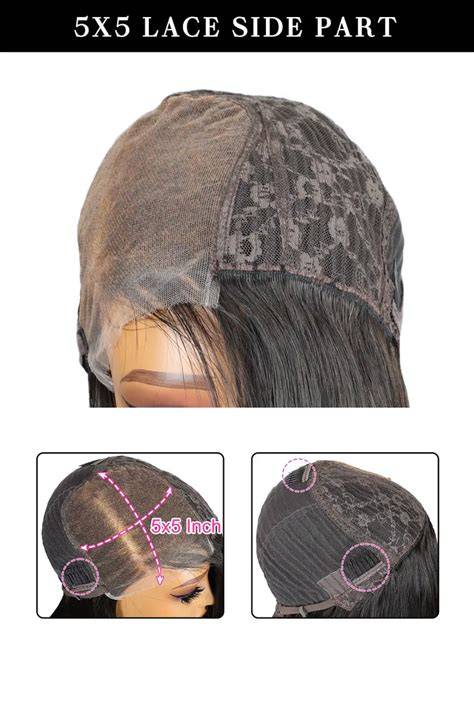
How To Make a Glueless Side Part Closure Wig | Step-by-Step Beginner Friendly (From Scratch)
Practical Notes on Installation
Keep the closure flat against the scalp to avoid ridges and ensure a natural part. Pluck the part along the side for a seamless blend with the rest of the hair. Use gentle heat tools as needed and blend the closure with your natural hair for a cohesive look.