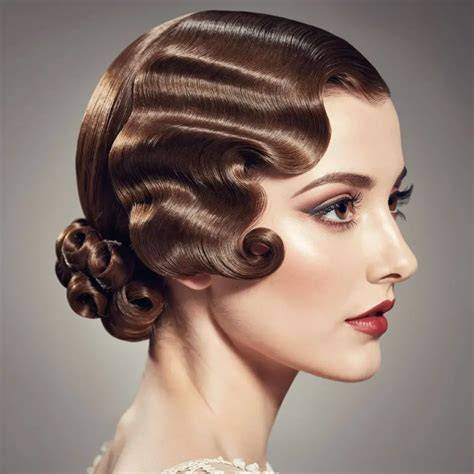
This piece draws from a practice-run perspective on finger waves for a vintage-inspired wedding, detailing practical tips, product recommendations, and step-by-step techniques to achieve organic, well-defined waves even when starting with short or naturally wavy hair.
Understanding finger waves in a modern context
Finger waves are not the most beginner-friendly, lazy hairstyle to DIY right before a big night out, but they offer timeless elegance when executed with patience and the right products. After years of doing this, I still get stressed out on weddings, yet finger waves provide a unique, era-appropriate option that can be tailored to individual hair types and lengths. With vintage-inspired weddings, if you don’t have a mass of techniques and ideas already stored away in your brain, you are in for a stressful day.
Key products and tools for structure and hold
What product do you use for finger waves? Hair gel is a must for creating structure and hold that lasts without frizzing or falling out. Mousse, aka the secret sauce for getting those smooth, defined, hydrated waves, complements gel for better control. A rat-tail comb helps create a precise part, and a fine-tooth comb smooths the gel and mousse through the hair while forming the signature “S” waves. A hair dryer helps set the style, though air-drying can work if time allows. The four essential products to DIY finger waves at home are: pattern strong hold gel, mousse, a hair comb set, and a high-quality dryer.
- Pattern Strong Hold Gel
- Mousse for definition and moisture
- Carbon Fiber Hair Combs Set for precision
- Tourmaline Hood Dryer or equivalent for setting the waves
Step-by-step approach to creating finger waves
Layer your products by applying mousse first for moisture, then gel for hold. Part your hair in the direction you want it to lay, using a fine-tooth comb to smooth the sides and straighten the part. Create a “C” shape by pressing your finger against your head and guiding hair forward with the comb to form the curve. Finish the “S” wave by moving to the opposite side of the “C” and guiding hair back in the other direction without disturbing the first shape. Repeat this pattern down the side and then onto the other side of the part. If there’s hair at the back, use your finger as a guide to keep shapes consistent all around. Let it dry, using clips to reinforce the shape if needed, or wrap the hair to set while you finish getting ready.
Put differently, layering products is crucial: mousse helps hydrate and soften while gel provides structure and long-lasting hold. The combination works especially well on curlier hair, helping to keep the waves defined without becoming stiff. For longer hair, more product and time under the dryer are typically required to reinforce the shape.
Adapting finger waves to different hair types
Finger waves work across hair lengths and textures with appropriate adjustments. For curly hair, start with gel to set the foundation, then slick down the sides and apply more mousse to create the S-waves. For straight hair, use more gel and mousse to build hold, and consider a softer wave by using less gel in the back to blend with natural texture. For natural hair, detangling or leave-in conditioner prep followed by curl cream and strong-hold gel helps achieve a sleek, durable wave pattern.
In practice, you can tailor the degree of wave by choosing where to place the part and how aggressively to sculpt the S-waves. Organic, soft waves tend to read more natural and flattering, especially on shorter hair, where waves do not form a single continuous line but rather a series of gentle, connected arches.
Technique nuances and what makes finger waves feel authentic
The key to authentic finger waves is listening to the hair. Let the hair tell you where it wants wave, which is why not all waves connect in a perfectly symmetric row. Techniques that respect the hair’s natural tendencies yield more comfortable, longer-lasting results. A 10-minute setting under the hairdryer can be enough for some textures when products are well-dispersed and the hair is properly saturated.
Practical tips for practice runs and wedding-day success
Practice runs are invaluable for vintage-inspired weddings, enabling the stylist to observe how the style holds up with movement and styling products. If you’re preparing for a wedding party, a well-practiced finger wave looks cohesive without appearing forced. For best results, choose a part that suits the client’s face shape and personal style, ensuring the waves align with the vintage aesthetic without compromising comfort.
Hair length can be a constraint, but finger waves can be achieved on medium-to-long hair with appropriate product quantities and drying time. Keep clips in during drying to reinforce the shape, then remove them gradually as the style sets. For the bride’s party, a practice run helps anticipate how the waves will translate on different hair textures and how to balance product usage across multiple heads.
Additional considerations and common questions
Practice and patience are essential because waves require careful shaping and setting. If you’ve failed at the first attempt, you likely lacked the correct products or didn’t apply them in the right sequence. The right combination of gel and mousse, plus the right tools, dramatically increases the likelihood of achieving elegant, durable waves rather than a temporary, loose result. The goal is to create waves that are not overly uniform but organic and soft to suit a vintage-inspired look.