Begin with understanding that shaping brows to achieve a straightened arch is about controlled removal and precise filling. The goal is to create a gentle lift without the brow appearing shocked or overly arched. Start by mapping your brows to establish starting points, length, and arch placement that suit your face shape.
1. Brow Mapping and Baseline Shape
Find your starting point. Hold a brow pencil vertically near the inside corner of your eye. Find the point where your brow pencil crosses your brow bone. Find your length. Start by placing your brow pencil at the outside of your nostril, then turn it 45 degrees to line up with the outer corner of your eye. Mark the ideal length for your brow. The place the pencil extends past the edge of your eye is the ideal length for your eyebrow. Line up your pencil with the center of where your pupil would be if you were looking straight ahead. Your arch should not be in the center or near the end of your eyebrow. Use your eyebrow pencil to fill in all of the brow from your starting to ending point. You want your brows to be at least as wide as 3 brow-pencil strokes.
Once you’ve mapped your brows, brush them up from the inner corner toward the arch, then continue toward the end in the direction of hair growth. This helps reveal stray hairs outside your desired shape. If necessary, tweeze only from underneath the arch and outside edges to soften the lift without shrinking the arch too much. When tweezing, focus on stray hairs that sit below the arch area or outside your defined “beginning” and “tip” markings. The aim is a gentle lift for a soft, natural arch rather than a dramatic, high peak.
2. Tweeze Under the Arch for a Softer Lift
With all dots in place, lightly tweeze from underneath your brows to enhance shape. Don’t overpluck. Target strays that sit below the arch and those outside your defined beginning and tip. Avoid going too deep into the arch to prevent a permanently shocked look. A gentle lift is the objective for a flawless finish.
Top tip: If plucking stings, try after a hot shower when warmth loosens strands for easier tidying. Post-pluck, soothe with an ice cube if your skin tends to swell or redden. These tweaks help minimize discomfort and irritation while maintaining precision.
3. Fill Sparse Arches with Natural Definition
If your arches are sparse, reach for Brow Pro Microdefiner Pencil to fill with ultra-natural-looking definition. Start from the base of the arch and sweep the pencil up toward the temples using short, sharp strokes rather than a drawing-on approach. This motion yields a soft arch rather than a heavy finish. For beginners, choose a shade lighter than your natural brows and apply with a light hand.
To ensure the arch’s alignment with your face type, consider your facial shape when deciding how angular or rounded your arch should be. Practice shapes that complement your features rather than conforming to a universal standard. The right arch enhances facial balance and brightens the eyes.
4. Precise Filling and Texture for a Realistic Arch
Fill in sparse areas by drawing small, upward strokes that mimic real hair. Begin at the inner corner and work outward, ensuring even distribution and a natural gradient to the arch. When shaping the arch, apply product slightly outside the natural brow line at the arch area if you want a lifted yet controlled arch.
To add texture and dimension, use a brow gel (tinted or clear) and run it through the brows from the outer corner to the inner corner, then brush upward from start to arch and again from arch to end. Texture helps the brow look feathery and natural while locking the shape in place.
5. Finishing Touches: Grooming and Maintenance
Use a spoolie to comb brows into place and trim any hairs that are more than 1/8" longer than their neighbors. Avoid razors for brows to prevent ingrown hairs and irritation. When brow hairs extend above your natural top, trim carefully to preserve a smooth line without jagged edges.
After shaping, consider a brow highlight beneath the arch to emphasize lift. A lighter shade along the brow bone can enhance the arch’s appearance without adding bulk. For ongoing maintenance, use a clear brow gel to set the shape and a tinted gel if you want extra fullness or color depth between fills.
6. Brow Mapping for Different Face Shapes
Different brow shapes work better with different face shapes. For example, those with square faces may benefit from rounded brows, while those with rounded faces may opt for angular brows. There isn’t a one-size-fits-all solution; the ideal arch is the one that makes you feel confident and balanced. Brow mapping helps you predefine the arch before applying products, saving time and reducing trial-and-error during styling.
7. Products and Tools to Achieve the Look
Choose products that fit your goals: brow pencils for fullness, brow pomade for more dramatic control, brow gels for setting, and brow highlighters to emphasize the arch. For a lifted appearance, the key is applying product slightly outside your natural brow line at the arch, then tapering back toward the hairline as you move outward. This creates a defined yet natural arch rather than a harsh line.
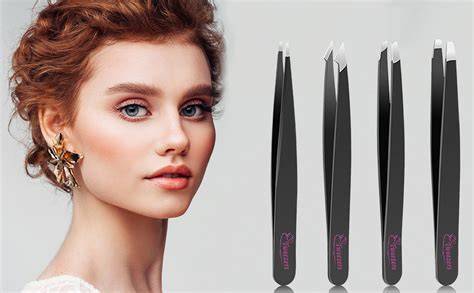
Supplemental tools include a quality angled tweezers for precision, and a spoolie brush for blending and grooming. Waxing can also be used for shaping, but practice and proper technique are essential to avoid over-waxing. When waxing, work in small sections from the inside outward with muslin or pellon strips, pressing firmly and removing against hair growth for clean results.
8. Extra Tips for Longer-Lasting Arches
Over-plucked brows may require pencil tricks and careful regrowth. If eyebrows are sparse, tinting 1-2 shades lighter than hair color can help even out tone while keeping a natural look. When you’ve removed too much, give your brow hairs time to regrow and avoid over-tweezing or over-waxing. A clear plan and consistent routine help achieve a lasting arch that suits your face.
Final note: practice brow mapping, maintain consistency, and adjust your routine as your facial features change with age or styling preferences. With the right combination of shaping, filling, and setting, you can achieve a straightened-arch look that still reads natural and expressive on any face.
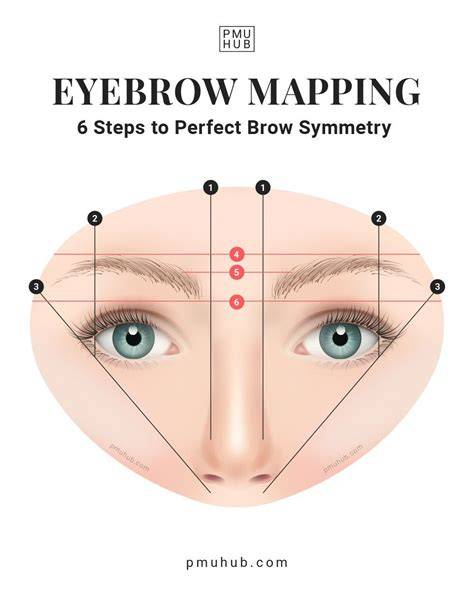
HOW TO: Brow Mapping - In Depth Tutorial