Many of us cherish the soft memories of our cats and want tangible reminders that fit into daily life without shouting their memorial purpose. A growing trend blends fashion with sentiment: jewelry and small keepsakes that encase or incorporate pet fur in a discreet, wearable way. These touchable mementos act as grounding touchpoints, allowing memories of purrs, snuggles, and playful antics to surface with a simple glance or a familiar stroke of the piece.
How to create touchable fur keepsakes
Begin by choosing an archival-friendly container and adhesive system that keeps fur secure yet accessible. You’ll want your pet-able keepsake to fit nicely inside of an archival plastic bag. Whether you’re using one with a zip top or not, it’s important that it fits securely so that the fur-lined sticky paper doesn’t slide around. You don’t want the hair to become matted or tangled because of friction. When I created mine, I used archival bags that were 10.8 cm x 8.3 cm (4.25” x 3.25”), which seemed like a nice size to me.
Next, test entry and exit: be sure to test to make sure it slides in and out relatively easily without having too much room to fit. Again, you want a nice snug marriage between the paper and the bag.
Preparation matters: first, figure out which side of your adhesive paper is actually the part with the stickiness on it. Now, on that side of the paper, attach a small ribbon handle. This will allow you to pull the finished keepsake in and out of the bag without damaging it in any way. I attached my ribbon with a bit of tape, but you could use archival glue or something similar.
Avoid a full reveal: do NOT peel back and/or remove the entire thing! This is super important. You only want to reveal a little bit of the sticky part of the paper - just enough to adhere the fur you currently have at hand. The depth of your first peel will depend on the length of your pet’s fur. The idea is that you will reveal enough tacky paper to place your pet’s fur with it just slightly hanging off the end of the paper.
Handle with care: don’t touch the sticky part with your fingers! You want to maintain all the tackiness for adding your pet’s hair.
Strategic placement matters: starting at one side of the paper (not in the middle), spread out your pet’s hair. You want the cut side of the fur to be entirely on the sticky paper with the natural end of the hair hanging over the edge of the paper (on the ribbon side). Don’t pile it too thickly - you ideally want each hair to make contact with the sticky part of the paper so that you secure it in place.
Layering and color grouping: if you have more fur to add, continue to add it to the exposed portion of the sticky paper. Do not expose any more of the sticky backing until you’ve covered the entire first row with fur. If you have more pet fur to place, gently peel back a tiny bit more of the cover paper and fold it over. This time, you will want to expose a less-deep strip. You’re going to place the second row in the same orientation as the first row, but in such a way so that it overlaps the first row - just like your pet’s fur does in real life. Your goal is to adhere about 1 cm (0.5”) of the cut ends of the pet fur this time (i.e. If your pet is multi-coloured, I’d recommend being strategic about how you organize the fur. Try to reproduce the types of colour groups you find on your dog or cat or rabbit by organizing your clipped fur by hue). This will make a much more pleasing and natural result than if you just place it all randomly.
Finishing and reuse: When you’re done adding all the fur you have available, replace the cover paper to its original position. Be sure to insert it with the ribbon end facing out so that you can easily slide it out again in the future. The next time you clip more of your pet’s fur, add it in the same fashion, only revealing new sticky bits of the paper when you have fur to cover it.
Sharing and community: I’d love to see the touchable pet keepsakes you’ve created with this method! You saw Spart’s finished one above and below and Tia’s at the top of this article. Please comment with pictures of your creations. Perhaps you can improve on my method! Please note: I have not put this method through long-term tests.
Variations and ideas for pet hair memorials
Although the described method focuses on fur placed on adhesive paper within a bag, there are complementary approaches to achieve similar results. Some people prefer to embed fur into resin jewelry or to set fur into metal or enamel pieces that are polished to a subtle gloss. Others choose small keepsakes like keychains, pendants, or brooches that subtly incorporate fur fragments, keeping the memorial intimate and wearable. Each variation offers a different balance of visibility and concealment, allowing memory to accompany daily routines without overt memorial symbolism.
Practical tips for long-lasting keepsakes
- Use archival materials to prevent yellowing or degradation of fur color over time.
- Avoid excessive handling of the sticky surface to preserve tackiness and prevent shedding or fraying of fibers.
- Store completed pieces in a cool, dry place away from direct sunlight to minimize damage.
- Document the process and colors of fur to maintain a sense of the original pet’s appearance for future reference.
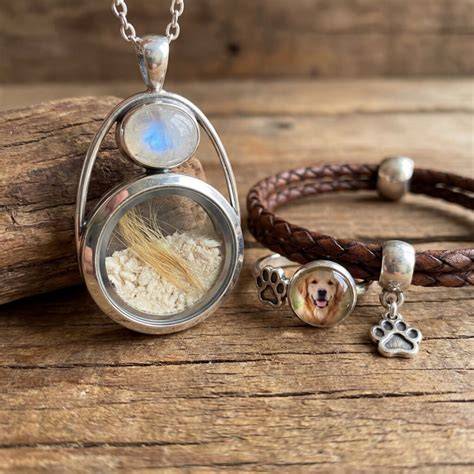
In addition to the described method, exploring imagery like jewelry designs featuring hair inlay, small resin pendants, or discreet pet-themed motifs can help inspire your next piece. The key is to maintain a balance between aesthetics and memory, so the keepsake remains wearable and meaningful without shouting its memorial purpose.
Making Your Own Pet Hair Keepsakes: UV Resin
For those who want visual guidance, searching for short tutorials on archival fur preservation and resin embedding can provide step-by-step demonstrations while you craft your own personal talisman.
Table: quick reference for materials and steps
| Step | What to do | Tips |
|---|---|---|
| 1 | Choose archival bag and adhesive paper | 4.25” x 3.25” bags work well |
| 2 | Test fit | Ensure snug fit to prevent sliding |
| 3 | Attach ribbon to sticky side | Use archival tape or glue |
| 4 | Peel minimal backing | Expose just enough to adhere fur |
| 5 | Place fur in first row | Keep ends hanging over edge |
| 6 | Add subsequent rows | Overlap like natural fur growth |
| 7 | Replace cover and seal | Ribbon end should face out |