Creating voluminous, shiny, curly hair is the easiest way to glam up your look, no question about it. But if you weren't blessed with naturally curly hair, it can be a bit of a gamble to try to bring curls to life with a curling iron or wand. To take the guesswork out of how to use a curling iron and make the overall styling process easier, we’ve put together tutorials on how to curl your hair with both curling irons and wands, including automatic curling irons. Trust us: With the right tool and styling products (like hair mousse, heat protectant, and hair spray), you’ll be able to confidently curl your hair in no time.
Before buying your curling tool of choice, take a few things into consideration. For starters, determine if you prefer a curling iron with a clamp or a wand. A curling iron with a clamp, as you can probably guess, features a clamp that helps hold your hair in place as you curl. A wand curling iron has no clamp. Instead, you wrap your hair around the barrel and hold it in place while the curl forms. Next, think about how curly you want your hair to be. If you’re looking to create tightly wound coils, you’ll want to choose a barrel size of ¾-inch or less. As far as types of curling tools go, ceramic and tourmaline ones are always a good bet, as they can help minimize the look of frizz.
To get the most out of your perfectly curled look, it’s a good idea to start off with clean hair. Hop in the shower and use a system of shampoo and conditioner formulated to manage the appearance of frizz, like the L’Oréal Paris EverPure Frizz-Defy Shampoo and the L’Oréal Paris EverPure Frizz-Defy Conditioner. Once your hair is about halfway air-dried, blow-dry it the rest of the way using a boar bristle brush until it’s completely dry. Now that you’ve blow-dried your hair, it’s time to get to work with that curling iron or wand. First, find the proper heat setting for your hair. Typically, it’s a good idea to test out the lowest heat setting possible to see what type of curl it creates. Once you’re done heating up your curling iron, divide your hair into two or three horizontally-stacked layers depending on how thick your hair is (fewer to curl fine hair and more to style thick hair). Use a lobster clip to hold the topmost layers out of the way while you start curling the bottom section.
Curling with a curling iron (clamp)
1. Grab a section of hair. Create a section of hair to curl. The smaller the section, the tighter the curl. 2. Position your curling iron. Open the clamp of your iron, then place it toward the root of your section of hair, with the hair placed between the open clamp and the iron. 3. Close and slide. Lightly close the clamp, then slide it down the section of hair until it’s at the very end. 4. Twist, twist, twist. Twist your curling iron up toward your roots, wrapping the length of the section around it in the process. 5. Open the clamp and release. Gently open the clamp and pull the curling iron from your hair, allowing the curl you just created to hang freely.
Curling with a wand (clipless)
1. Section your hair. Like with a curling iron, you’ll want to start by splitting off a section of hair to curl. 2. Position your wand. Hold the wand in the hand that’s opposite the side of hair you’re curling. 3. Wrap around. 4. Wait and release. Editor’s tip: If you prefer a more natural look, curl your hair away from your face.
- Section your hair. Like with a curling iron, you’ll want to start by splitting off a section of hair to curl.
- Position your wand. Hold the wand in the hand that’s opposite the side of hair you’re curling.
- Wrap around. Wrap the hair around the wand and hold briefly.
- Wait and release. Release the curl and let it fall naturally.
Automatic curling irons are bound to be your best friend-they do all the legwork for you. I’ve been a die hard curling iron fan for years, but a wand changed my approach to curling thick hair, giving a more relaxed, beachy texture. The look you achieve with a wand curl versus a standard curling iron curl is definitely slightly different. Curling irons tend to be a bit more defined, more “curly” and feel more proper. So to get the look, I sometimes would use my curling iron like a wand. Due to my hair being SO thick, this was the best way for me to get the look. I’d wrap it around the open clamped curling iron, then clamp down and hold it for a few seconds. This way I got heat all around the hair, but still used the wrap technique to get that wand look vs curl.
When choosing a collection at a brand, consider titanium for heavier, long, or hard-to-curl hair because it’s a more consistent heat. Temperature control and auto shut-off are helpful features. Start with around 370-390 degrees for thicker hair, and test with smaller sections for tighter curls. You can always adjust to looser curls by wrapping larger sections.
After curling, let the curls cool to set their shape. Pinning the curls while they are hot and allowing them to cool is essential-don’t rush this step. Once cooled, gently break up the curls with your fingers or a brush depending on the desired effect. Apply a light hold hairspray or texturizing spray to lock in the look and boost texture.
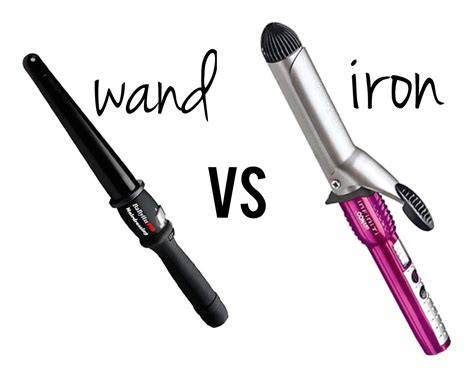
CURLING IRON VS WAND || what's the difference?
Tips for better results include using a heat protectant spray, a light styling mousse for structure, and ensuring the hair is dry before styling. If you want extra volume at the crown, tease lightly with a rat tail comb and apply a smoothing treatment to keep frizz at bay. For the best long-lasting curls, slow down your technique, give curls time to cool, and avoid brushing immediately after styling.
Practical notes and common mistakes to avoid
Common mistakes include curling wet hair, using excessive heat on damaged hair, and rushing the cooling step. Remember: heat tools are shortcuts to texture, not a substitute for good prep and protection. You can achieve a natural wave or a defined curl depending on your technique, section size, and how you wrap the hair around the barrel.