Home Brazilian waxing can be a viable, less irritating, longer-lasting alternative to shaving, and with the right approach, you can achieve professional-like results. The process isn’t painless or easy, but with careful preparation, the right products, and steady technique, you can minimize discomfort and maximize effectiveness.
Choosing the right at‑home wax for the Brazilian area
Be sure to look for a product that specifically says Brazilian on the packaging, as not all formulas are suitable for this sensitive area. For a first timer, it might be easiest to use a hard wax, as strip waxes are a little bit more difficult to do on your own and take practice. Hard wax also puts all of the power in your hands-literally. Try using hard wax or the sugaring method, as you will be able to have more control of the wax and where you are placing it.
Most at-home wax treatments have clear instructions on how long to heat the product. It should be the consistency of cold honey. Do a test patch of the wax on your inner wrist to make sure it’s not too hot or too runny. Reheat after 10 to 12 minutes of waxing as needed.
Timing and preparation: when to wax
Right after a shower, when your skin is clean, soft, and dry, is the best time to wax. You shouldn’t use any lotion or oils before, but there’s no need to prep with an alcohol pad, either-doing so can overdry the skin. Avoid waxing during your period or after drinking alcohol, as you’ll be more sensitive and prone to bleeding. Also avoid Brazilians if you are taking oral retinoids or using topical Retin-A, or if your skin is irritated or flaky.
Positioning and technique: how to wax yourself
You might have to change positions a couple of times, depending on the area you are waxing. Try standing, while propping one leg up on a bathtub or chair. This position also works for the inner and back areas. Stand in front of a mirror, if possible, to give yourself extra visibility. If you have trouble reaching, you can also lay in front of a standing mirror, while bending your knees and spreading your legs widely. Prop up your lower back with a pillow. You can do this on the floor or on your bed on top of a towel.
Before you start, be sure you test out different positions to see what is most comfortable for you and provides the best reach for each area you plan to wax. Start waxing from the top inner thigh by your hip area. It’s easier to begin at the edges where hair is thinner and work your way in, and smaller sections are simpler to manage than large strips.
Apply the wax in a swirling motion, like you’re putting peanut butter on bread. The wax should be about the thickness of a quarter or nickel, and the end of the wax should be in a place with no hair for a better grip. When the wax feels tacky-but not sticky-it’s ready to be removed. Pull the strip in the opposite direction of hair growth, adjusting for areas where hair grows toward the center or sideways, especially in the inner thighs and back.
For hard-to-reach areas, lean back at a comfortable incline and work one side at a time. If you’re unsure, take extra time to assess each area before applying heat.
Post-wax care and soothing skin
The most important thing is to read the instructions and precautions thoroughly before waxing to minimize pain and irritation. After waxing, relax, avoid alcohol or coffee beforehand, and don’t wax during your period. If you want to prepare your body, take a pain reliever like Advil or Tylenol before starting. Holding the skin taut while you wax can help reduce pain, and taking a deep breath before pulling your strip can ease the moment of removal.
Clean up with coconut oil to remove residual wax, and use a cool compress and witch hazel to calm the skin. Avoid fragrances to reduce irritation. For the next 24 hours, wear cotton underwear and skip workouts, steams, or saunas that could clog still-open follicles.
Maintaining results: care between waxes
After waxing, exfoliate at least three times per week to prevent ingrown hairs. Glycolic wipes can help keep the area exfoliated, and coconut oil can moisturize and soften regrowth after the first 24 hours. If you plan to continue waxing, try not to shave between sessions to reduce irritation and ingrown hairs.
Practical checklists and quick references
- Choose a Brazilian-specific hard wax or sugaring product for better control.
- Heat to the consistency of cold honey; test on the inner wrist.
- Wax after a shower; avoid lotions, oils, and alcohol pads.
- Use a suitable positioning strategy and practice poses beforehand.
- Wax in small sections; start at the edges and move inward.
- Keep skin taut and breathe deeply to minimize pain.
- Post-wax: cleanse with coconut oil, apply cool compress and witch hazel, wear cotton underwear.
- Exfoliate regularly to prevent ingrown hairs; consider glycolic wipes.
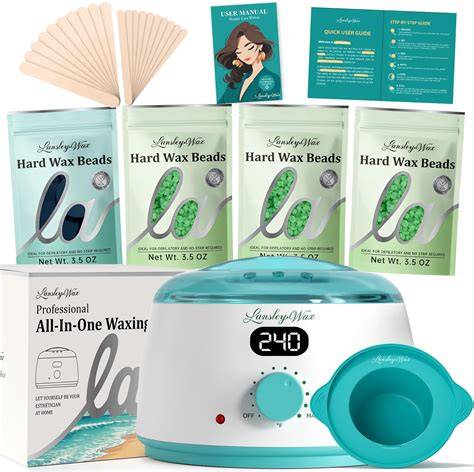
How to Do a Brazilian Wax at Home: Ultimate Step-by-Step Guide
| Product | Formulation | Best For | Price |
|---|---|---|---|
| Nad’s Brazilian & Bikini Wax Kit | Hard wax | First-timers | Varies |
| Bliss Poetic Waxing At-Home Kit | Hard wax | Control & precision | Varies |
| Gigi Brazilian Waxing Kit | Hard wax | Professional-like results | Varies |
By following expert guidance and selecting the right products, you can achieve smoother, longer-lasting results at home with a Brazilian wax. Practice and patience help you refine your technique, reduce discomfort, and maintain bikini-area skin health between sessions.