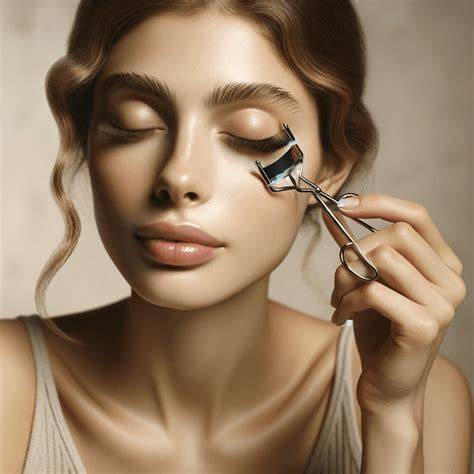
From heating your curler with a hair dryer to creating a “C-shaped” or “L-shaped” curl, beauty creators have been testing it all. Some swear by using unconventional tools, while others proclaim layering mascaras or pairing their curl with falsies for dramatic effects. But what’s the ultimate method? Honestly, it all comes down to personal preference, the right curling techniques, and a bit of healthy lash care (like incorporating an eyelash serum into your routine). Whether you’ve flawless, lifted lashes begins with the right prep, and we’re running you through all the steps to curl and lift lashes like a pro.
Start With Clean, Bare Lashes
Before you dive into your lash routine, let’s talk about the #1 rule: never, ever use an eyelash curler on wet mascara. Trust us, it’s a recipe for clumping, sticking, and yikes, even losing precious lashes! Instead, start with a clean, bare lash canvas for the smoothest, safest results. Here’s your pre-curl prep: Grab a clean spoolie, and gently brush through your lashes to separate and define. Or, if you want to double down on precision, the Lash & Brow Comb has you covered with its dual-ended magic. This step is key for removing any leftover product and ensuring every lash is perfectly in place. These brushes gently detangle your lashes, prepping them for an even curl, and help lift your lashes from the root for maximum volume. Once your lashes are prepped and ready, use your curler to create a beautiful, lifted shape. And if you’re all about that extra-long lash vibe, pair your routine with Enhancing Lash & Brow Serum because healthier, fuller lashes curl like a dream. By taking this extra step to care for your lashes, you’ll ensure that your curl holds better and lasts longer.
Grab Your Favorite Eyelash Curler
Grab your favorite eyelash curler, and let’s take your lash game to the next level. If you’re aiming for precision and comfort, we recommend either our Pro Eyelash Curler or the classic Eyelash Curler. The Pro Eyelash Curler is perfect for those who want an all-around professional lift. With a longer handle and an ergonomic design, it offers a precise curl that lifts lashes from root to tip. It features a rubber stopper for a gentle but firm hold, preventing any tugging or pinching just a smooth, comfortable curl that’s easy to use… even if you’re not a pro. The Classic Eyelash Curler offers a more compact option, ideal for those who prefer a more controlled curl. Its curved shape is designed to fit your natural lash line, giving you a beautiful, even lift. Both curlers ensure your lashes easily lift, separate, and deliver voluminous results!
Gently Squeeze to Curl Lashes
Achieving beautifully curled lashes starts with the right technique, and a gentle touch is key. Begin by positioning your eyelash curler at the base of your lashes, as close to your lash line as possible. Take a moment to ensure that all of your lashes are fully inside the curler, including the outer and inner corners. This step is crucial for an even, lifted curl. Once your lashes are in place, gently squeeze the handles of the curler. You can either hold the handles together for 10-15 seconds for a more classic curl or use the second method: gently pulse the handles by giving small, gentle squeezes. The pulsing method is a great way to create a more natural, long-lasting curl that will hold throughout the day. Some people find it helps to look down while curling your top lashes, as it ensures the curler is aligned with your lash line and creates the perfect lift. Whether you’re prepping for a glam look or a natural finish, this technique leads the way for gorgeous, lifted lashes!
Curl Lashes and Repeat
Once you’ve curled one eye, repeat the same steps on the other side for a balanced, symmetrical look. Take your time to line up the curler at the base of your lashes, gently squeezing or pulsing for 10-15 seconds. If needed, feel free to go over the steps later in the day to refresh your curl or add extra lift. A quick re-curl can give you a longer-lasting lash look that will stay put!
Apply Your Favorite Mascara
Now that your lashes are beautifully curled, it’s time to apply mascara for that perfect finish. For a sleek, long-lasting lift, try tubing mascara. If you’re looking to amplify your curl while adding volume, curling mascara is your go-to. For a dramatic, full-bodied effect, reach for a volumizing mascara. If you have straight eyelashes, you may have wondered, at some point, how to keep your eyelashes curled (or if such a feat is even possible). It’s a valid question-after all, meticulously curling your lashes only to have them fall flat an hour later is incredibly frustrating. Thankfully, there are a few things that you can do to help your lashes hold a curl. Straight eyelashes may seem less than ideal when you're longing for a lifted look, but you don't have to settle for lackluster fringe.
- First, ensure your lashes are free from oil, old mascara, or any product buildup, as residue can interfere with your mascara application.
- When curling lashes that simply don’t want to curl, using a high-quality eyelash curler can make a world of difference. Look for a stainless steel option with a removable foam pad-these tend to be durable, dependable, and easy to use.
- Much in the way that hot tools can help curl or straighten your hair, heating up your lash curler can help your lashes better hold their shape. Add a touch of heat to your curling routine by warming up your eyelash curler with a blow dryer for a few seconds.
- Curl at the base, mid-point, and tips in sequence, holding each curl for about ten seconds to define a lasting lift.
- While mascara primers work wonders for some, opt for lightweight formulas to avoid weighing down your lashes.
- Next, swipe on a long-lasting mascara aligned with your desired result. If you’re aiming for full, thick fringe, try a volumizing mascara; for length, choose a lengthening formula.
- Avoid layering on heavy mascaras. If you want drama, use a buildable formula that won’t weigh down your lashes.
- For a semi-permanent solution, consider a lash lift. This professional service curls lashes with results lasting up to six weeks.
Using a clean mascara spoolie, brush your lashes from root to tip to divide them and add definition. Never use a dirty eyelash curler on your lashes. Using a cotton swab and alcohol, gently clean the bouncy silicone pad portion of the eyelash curler. Be sure the curler is completely dry before you use it on your lash line. Never curl after applying mascara, as it can damage lashes and cause clumping. If your curler has oil or product residue on it, it may not grip effectively, interfering with the curl.
Some pro tips and hacks you might encounter include heating the curler slightly or using a spoon trick to lift lashes, but proceed with caution to protect your eyes. If you want more defined results, you can pair curling with a lash serum to bolster lash health over time, supporting a stronger curl hold. The overarching message is that curling is quicker and easier than it seems, and with the right technique, you can achieve brighter, more awake-looking eyes in a few minutes each morning.
Pro Tips and Tools: What Pros Recommend
Professional makeup artist insights emphasize starting with clean lashes, choosing the right curler for your eye shape, and using gentle, controlled squeezes or pulses. Heating the curler moderately, using waterproof formulas, and avoiding heavy mascara layering are common threads. For round eyes, certain curlers work best, while almond-shaped eyes may benefit from different shapes. If you wear falsies, curl before or after application depending on the method to meld natural lashes with extensions for a seamless look. Some artists advocate simple hacks like pressing lashes to the curved side of a spoon to mimic curling, though caution is advised. A good mascara choice-waterproof for longevity, with a precise wand-can significantly extend the curl’s lifespan. In short, the best method blends technique, careful tool choice, and lash care over time.