Makes your own mascara is not as hard as it seems. I love that I make my own makeup right at home with all-natural ingredients, and this guide shares my newest endeavor, mascara. This post may contain affiliate links.
What is Mascara Made of?
For as long as I can remember, I have heard mascara was made with bat feces. Mascara contains a colorant guanine, which can be found in bat feces, but for mascara, it is actually derived from fish scales. Better than the alternative, at least. But, there are still many other ingredients found in mascara that I would rather not put on my body. I would much prefer to make my own to avoid such ingredients.
Many natural mascaras use beeswax or carnauba wax to thicken. Bentonite Clay - Helps the mascara dry and harden and not smudge. Different brands use different pigments to dye their mascara. This usually means iron oxides. You can get a very similar effect with the black mineral powder. You can use activated charcoal or black clay instead, but I prefer the texture with the mineral powder.
How to Make Mascara Waterproof?
The added beeswax in this recipe will help to make this mascara waterproof. Beeswax has a natural protective substance called propolis. Propolis has antibacterial, antifungal, and antiviral properties that can produce healthy lashes. I prefer to use beeswax pellets to make measuring small amounts easier. If you don’t have pellets, you can shred some beeswax off of a bar to get the amount needed for this recipe.
How to Make Mascara that Doesn’t Smudge?
The beeswax will help keep the mascara from running, and the added clay will help it not smudge. I am using bentonite clay in this recipe, but you could also use white clay, green clay, or pink clay. Bentonite clay is cleansing, purifying and can help remove impurities.
Step 1: Add beeswax, vegetable glycerin, charcoal and clay to a small saucepan and melt on low heat. Stir it occasionally with a wooden spoon until the beeswax is completely melted. Its going to look clumpy and dry, but refrain from adding any more oil at this time.
Step 2: Remove from the heat and stir in the aloe vera gel and essential oils if using. Continue stirring until you get a really creamy texture.
Step 3: Transfer the mascara to your mascara tubes. Tip. I like to add it to a zippered bag, cut a small corner, and squeeze it into the bottle that way. For an ashy/gray color-use less charcoal. For a pure black mascara-use more charcoal. The mascara coming out of the saucepan is going to be a bit thick and pouring into the mascara tube can be difficult. I find it easiest to spoon the ingredients into a plastic bag, cut a hole in the corner, and squeeze it into the tube.
If the mascara is too thick, add more glycerin, aloe, or oils. If the mascara is too thin, add more clay or beeswax. This mascara should last up to a month in a cool, dark area. I did opt for a preservative-free formula for a gentler experience, but that means keeping a close eye on the product’s quality is key. To maximize its lifespan, store your mascara in a cool, dark drawer - think vanity cabinet, not bathroom shelf. Discard the mascara if you notice any separation, discoloration, or a funky odor.
Practical Tips for Easy Production and Storage
You don’t have to add in essential oils, but they do have some great benefits for the lashes. Be careful when applying your mascara to make sure the oils do not get in the eyes. If you like this post, you may enjoy one of these reads next. Add beeswax, vegetable glycerin, charcoal and clay to a small saucepan and melt on low heat. Stir it occasionally with a wooden spoon until the beeswax is completely melted. Its going to look clumpy and dry, but refrain from adding any more oil at this time. Remove from the heat and stir in the aloe vera gel and essential oils if using. Continue stirring until you get a really creamy texture. Transfer the mascara to your mascara tubes. Tip. This recipe is for your own viewing pleasure and is not meant for healing purposes. Readers must perform their own research and tests before making any recipe.
To help with durability and feel, some readers lightly dust their lashes with arrowroot powder or organic cornstarch before applying for extra volume and grip. If you want lashes with more curl, use an eyelash curler before using the mascara. While this formulation isn’t strictly waterproof or water-resistant, the bentonite clay helps it dry harder to help prevent smudges, though I can’t guarantee it’s 100% smudge-proof in all situations.
Alternative Approaches and Materials
A clean mascara container is essential. A medicine dropper (like for giving medicine to children) can be used to transfer the mixture into the final container. Alternatively, you can add the ingredients directly to the mascara tube and mix them with the mascara bristles. You should be aware that as this is a very natural mascara recipe, using minimal ingredients, it cannot be compared to your shop-bought mascara in terms of volume and durability. If you don’t have these skincare ingredients on hand, buying natural or certified organic pre-made mascara might be a better option.
One of the most challenging parts of this mascara recipe is getting the mixture into the mascara bottle. Therefore my advice would be, DON’T! In the end, I decided to pop it into a little container and use an eyelash brush to apply. You just need to make sure you wipe off the excess to avoid clumpy looking lashes.
Notes on Safety and Clean Beauty
Parabens, phthalates, and fragrance are often avoided in clean beauty. Parabens are known endocrine disruptors, phthalates are linked to various side effects, and fragrance can conceal a mix of chemicals. If making your own mascara sounds kind of insane, consider exploring other clean mascaras you love and usually switch between. The Think Dirty app and the EWG’s Skin Deep guide are helpful resources for identifying safe ingredients across products.
This recipe uses a preservative (Plantaserve P or saliguard PCG at 1%) because it contains clay and needs preservation. If you choose to omit the preservative, you’ll need to store it properly and monitor quality closely. The final result is a rich, dark, creamy mascara with natural ingredients that provides a nice lift and volume, even if it doesn’t exactly mimic store-bought versions in longevity or clump-free performance.
Estimated Recipe Summary
- Bentonite Clay - helps the mascara dry and harden and not smudge
- Activated Charcoal Powder - provides the color
- Glycerin - acts as an adhesive and adds moisture
- Beeswax - thickens and waterproofs
- Aloe Vera Gel - smooths texture
- Optional essential oils - for lash benefits (use with care to avoid eye exposure)
- preservative (1%) - for longer shelf life if desired
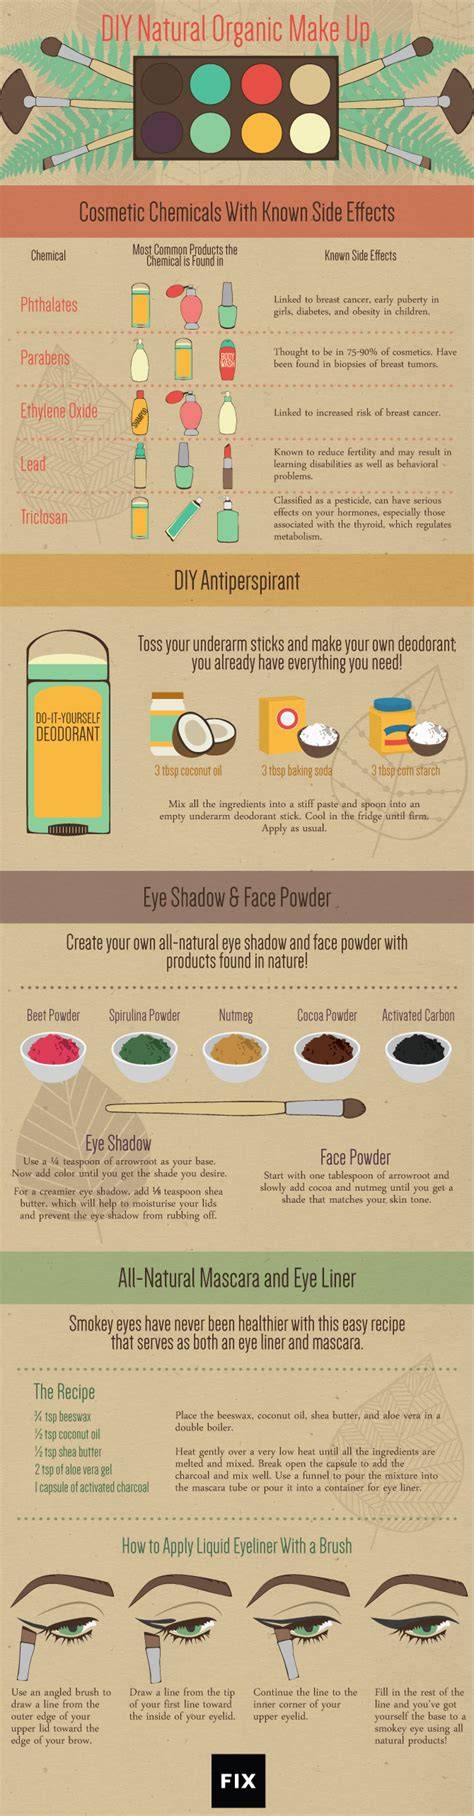
To make more of a volumizing mascara or a lengthening mascara, there are a few tricks. I like to lightly dust my eyelashes with arrowroot powder or organic cornstarch first. If you want lashes with more curl, use an eyelash curler before using the mascara. And remember, this is not waterproof or water-resistant by default, though the bentonite clay helps reduce smudging.
How It's Made: Mascara
Is making your own makeup worth it? For me, yes, because it enables a safer, more transparent routine and reduces exposure to some harsh chemicals. It’s easy to look past our eye makeup collection when it comes to cleaning up our daily routines. I’ve tested numerous ingredients and found combinations that work with natural ingredients while keeping application pleasant and mascara long-lasting enough for daily wear.
Whether you’re editing down your routine to focus on non-toxic products or simply curious about a natural option, this mascara recipe offers a practical and approachable path to clean beauty. If you’re curious about pre-made clean mascaras, consider options like Ilia, Milk Makeup, and W3LL PEOPLE, and use reputable resources to compare ingredients and safety ratings.