Balayage is a subtle freehand coloring technique where color is painted directly onto designated sections of the hair without using foil, creating a softer, more natural result than traditional foil highlights. Reverse balayage flips this concept by introducing darker tones to add depth and dimension, offering a low-maintenance path to a darker, more lived-in look. This article compiles the core principles, techniques, and formulas from expert guidance to help stylists craft multidimensional brunettes from previously lightened bases while maintaining a natural finish.
Foundations of reverse balayage
A reverse balayage adopts the same freehand painting as a traditional balayage, but instead of adding lightness, it's all about boosting dimension and depth. This application technique is designed for clients who have a previously lightened (or naturally light) base color, and are looking to transition to a darker tone with a more natural-looking finish. A traditional, full balayage is usually hand-painted with a lightener, like Blondor Freelights, bestowing a dark base color with a burst of brightness that adorns mid-lengths and ends. Meanwhile, reverse balayage still follows a freehand application technique, but the products and placement differ. You apply a toner in a darker shade than the base, sweeping it through the lengths and ends in painterly lowlights. This same shade can also be used to add a root shadow, tying the look together.
Key distinctions: lowlights, root shadows, and maintenance
Lowlights and reverse balayage both involve painting darker tones through a light base shade, but the difference is in the technique you use to apply them. Lowlights are traditionally applied in a pattern from root to tip, much like highlights, while reverse balayage is focused through the roots, mid-lengths and ends for a truly bespoke finish. Both are effective solutions for breaking up brightness and boosting dimension, but reverse balayage lends a more lived-in and sometimes sun-kissed look. A reverse balayage is often a cheaper option than a full balayage because you skip lightening steps, though it requires careful client matching and timing to avoid misaligned outcomes.
Practical application: from lightening to toning
- Step 1 - Lightening the hair: Start with lightening the hair using a suitable lightener and developer. In our workflow, a diffuse foiling pattern helps to create a soft, natural line rather than a harsh demarcation. Backcombing is used to break up the line of dye and ensure a natural-looking result, with a very thin weave over backcombed sections to feather the lightener into darker hair.
- Step 2 - Timing and sectioning: After developing for about an hour, protect the hair by washing out the bottom foils first, then proceed with the rest of the head. Fortify the diffuse look by adding babylights to backcombed sections for extended diffusion.
- Step 3 - Front sections and washout: Lighten the front sections and then wash out as needed.
- Step 4 - Toning: Tone the hair with a balanced formula such as a mixture including ½ 7.22, ¼ 5.1, ¼ 7.1, and 20 vol. and process for about 20 minutes before washing out and styling.
The goal is to maintain a natural, multi-dimensional effect that transitions smoothly from roots to ends, avoiding harsh lines and maintaining balance with the client’s natural base color.
Reverse balayage: formulation and placement
In reverse balayage, darker tones are painted onto the hair to create depth and dimension without lightening. The technique is particularly suited for clients who want to move away from lightened hues and into a richer, more natural-looking color. A key factor is choosing shades that harmonize with the existing base while keeping regrowth discreet and low-maintenance. To craft an authentic look, place darker color through the roots, mid-lengths, and ends in diagonal, painterly sections to avoid chunky or overly bold demarcations. If lighter colors are left on the ends, blend them into darker tones around halfway to ensure a seamless transition.
Root shadows are often employed to tie the look together, using a shade slightly darker than the base to reduce the appearance of regrowth while preserving depth. For example, a root shade like 6.22 or 7.22 can be used with 5 volume developer to create a gentle root melt that blends into the lighter lengths. The emphasis is on a natural transition, not a stark contrast.
Color dynamics: tones that work well for reverse balayage
Nearly any hair color can be adapted for reverse balayage, provided there is enough lightness in the base to allow the lowlights to show. Dark bases (e.g., very dark brown) may not yield a standout reverse balayage, whereas shades lighter than a medium brown can accommodate lowlights. Popular lowlight hues include golden, chocolate, and ash browns, with biscuit blonde tones offering depth when the base remains light. Reds and auburn tones can also introduce interesting warmth and movement, especially when you want to break up a coppery brightness. The color choice should balance contrast with harmony, ensuring the final look appears natural and cohesive.
Timing and longevity: how long does reverse balayage last?
All hair colors fade over time, but the longevity depends on the products and toning used. Permanent formulas can maintain lowlights for 6-12 weeks, while glaze-based or semi-permanent options may fade more quickly. Regular toning sessions every 7-8 weeks help maintain the depth and prevent unwanted brassiness. For a softer, more natural result, pair the reverse balayage with a color glaze and plan touch-ups that align with the client’s regrowth pattern.
Representative formulas and patterns
- Bronde Reverse Balayage: dark brunette tones with toffee-toned lowlights layered through mid-lengths and ends for depth and glow.
- Ash Brown Reverse Balayage: darkening ash-blonde to ash-brown tones for a cookies-and-cream effect with balanced highs and lows.
- Caramel Brown Reverse Balayage: caramel-blonde base with brown lowlights creating a softer, natural transition.
- Dark Brunette Reverse Balayage: deep brunette with subtle chocolate highlights, finished with a root melt for seamless integration.
- Toffee Honey Reverse Balayage: honey-blonde sections with toffee lowlights to add warmth and movement while maintaining a lighter, sun-kissed feel.
These examples illustrate how varied color families-blondes, browns, and reds-can be integrated into reverse balayage to achieve depth without compromising natural appearance. The approach emphasizes painterly application, diagonal sectioning, and controlled timing to ensure the final result blends with the client’s natural tone.
Practical tips for achieving the best results
- Always consider the client’s natural base and desired maintenance level before choosing tones and placement.
- Keep developers at or below 6 vol for reverse balayage to avoid over-lightening and to preserve depth.
- Use backcombing and thin weaves to diffuse lines and create a seamless blend between light and dark areas.
- Incorporate root shadows and soft melts to tie the look together and minimize visible growth.
- Consult the client about preferred textures and finishes, from sun-kissed to velvety-brunette, to tailor the technique to their features.
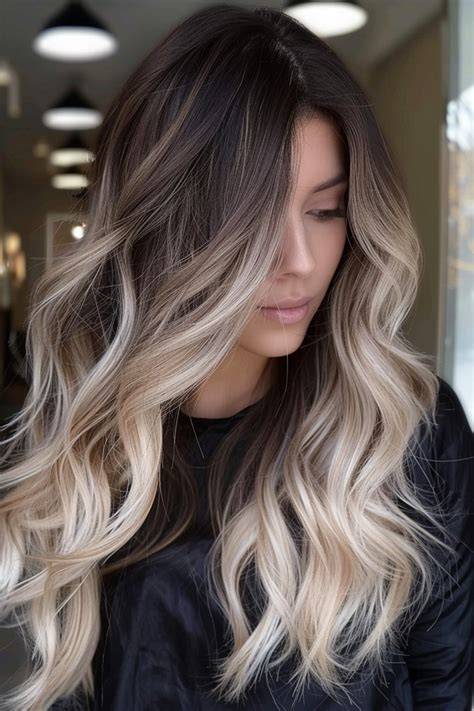
Infographic idea: a side-by-side diagram showing traditional balayage versus reverse balayage, with color placement and diffusion arrows to illustrate how depth is built and how lines are softened.
EASY 3 STEP REVERSE BALAYAGE
This technique can be implemented with careful sectioning, toning, and controlled processing to achieve a refined, natural result that suits clients seeking richer, more dimensional color without a harsh line of demarcation.