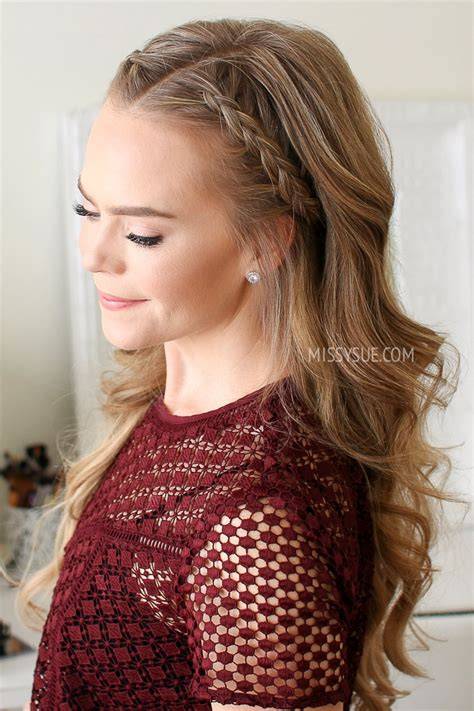
The lace braided headband is a stylish way to keep hair away from the face while adding a delicate, textured detail to any look. Unlike a traditional braided headband, this technique pulls hair from one side to create a distinct stranding effect that starts at the forehead and flows into the headband. The result is a cute, long-lasting style that works well with shorter or medium hair lengths.
Why choose a lace braided headband
Because it combines comfort, practicality, and visual interest, the lace braided headband is ideal for days when you want your hair out of your face without sacrificing style. For shorter hair, it provides a way to frame the face while keeping the hair contained, and for longer styles, it adds a decorative element that blends seamlessly with other braids or textures.
Materials and preparation
Items Needed: Brush, rat-tail comb, 1 small hair elastic, 1 hair band, 2 bobby pins, hairspray and curling wand (if desired). A texturizing tool like a NuMe wand can help create volume and definition before braiding. Time Requirement: 3-5 minutes. Skill Level: Medium.
Base styling can be left straight or textured. Texture helps the braid hold better and creates a more pronounced lace effect. If you want extra texture, you can curl the hair lightly before starting the braid.
Step-by-step instructions
- Part the hair from ear to ear across the top of the head using the rat-tail comb. Secure the back half of the hair with a hairband to keep it out of the way for now.
- Begin a Dutch braid near the left ear. As you braid, keep the braid as close to the part line as possible, away from the front of the face.
- Be sure to add hair into the braid only from the front, not from the back side of the head. This creates the lace/feather stranding effect from the forehead into the braid.
- Continue braiding up and over the head toward the other ear.
- Secure the braid at this point. You have two options:
- Finish with a simple braid down the remaining hair and secure with an elastic. This is good for younger girls.
- Use two bobby pins crossing them to pin the remaining hair directly behind the right ear. This is recommended for older teens and women.
- Release the back hair from the hairband and let it fall around the face to frame the headband naturally.
- Optionally pancake the braid by tugging on the elbows of the braid to flatten and intensify the braid’s appearance.
Finishing touches and tips
Use hairspray to set the style and keep the lace pattern crisp. If desired, lightly curl the ends or add small accessories like pins or decorative bands to enhance the overall look. The key is to maintain the airy, feathered effect by controlling how much hair you incorporate into the braid from the front while letting the back remain tidily secured.
Common variations
For a slightly different take, you can start the lace effect closer to the temple or experiment with a higher or lower placement of the headband. You can also vary the width of the headband by adjusting how much hair you pull into the braid from the front. These adjustments produce a range of looks from subtle to bold while preserving the fundamental lace braid structure.